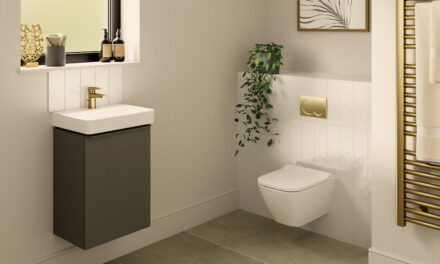

Jo Mailen shares a step-by-step guide to fitting Wetwall’s Elite bathroom wall panels.
athroom panels are quickly becoming the go-to way for installers and homeowners to quickly refresh a bathroom. They’re a faster alternative to tiling that doesn’t compromise on quality and aesthetics, which is ideal for installers and owners alike.
However, as much as bathroom panels are straightforward to install, there are some key differences and tips that it is worth installers knowing to get the pristine finish that customers are looking for.
Plan your installation
Traditionally, a bathroom fitter would need to consider maximising the chosen covering, adhesive, grout, spacers, and profiles, etc.
The beauty of using wall panels, such as Wetwall Elite, is that it simplifies the planning and installation process. Wetwall Elite is a trimless system that combines post‑formed edges with easy‑fit mechanics such as tongue‑and‑groove joints, making the planning process far more straightforward for installers.
These panels are designed to slot together without the need for additional profiles or trims. This means that installers only need to decide how many post‑formed edges are required to fill the space they’re working in.
Wetwall Elite’s tongue and groove joints are engineered for a fast, reliable fit, helping installers work efficiently even in tight timelines. Mapping out panel positions and checking measurements is still essential but, unlike traditional systems, there is generally no need to consider pattern flow, making preparation quicker and simpler.
A how-to guide on installing bathroom wall panels
Whether you’re starting a new bathroom project or tackling a refurbishment, the following steps are essential for achieving a quality installation and finish.
While straightforward to install, it’s worth knowing the key differences with panels which can elevate an installation to the next level. Following this guidance, you can install Wetwall Elite panels and easily achieve a watertight, seamless and long‑lasting finish that enhances any washroom space.
1, MEASURING
Measure and mark the height of the space where the first panel will be fitted, subtract 3mm for the space between the top of the panel and the ceiling, and then subtract a further 5mm for the space between the bottom panel and tray. Note: end panels returning into a corner will need 3mm subtracting from the edge that is going into the wall. Also, remember to ensure the position of plumbing cut-outs are also measured and marked.

2. WORKING WITH POSTFORMED EDGES AND JOINTS
There’s no ‘one size fits all’ method for installing wall panels, and each brand offers their own installation ‘how to’.
When working with Wetwall Elite panels, you’ll be benefiting from quick-to-fit tongue and groove joints. It’s worth noting that Elite panels should always be installed vertically, starting in a corner and working outwards.
For the first panel, remove the tongue on the corner edge so the receiving edge is a groove. And, once you’ve done a dry fit, as illustrated below in step four, make sure you apply a 2mm bead of Wilsonart Complete sealant to the back edge of the groove, and also into the back-edge tongue before fitting the panels together.

3. CUT AND DRILL
When cutting and drilling, keep panels fully supported at all times. They should be laid flat on a suitable bed and never overhang the cutting surface.
You should always cut into the postformed edge rather than out of it and use a 160 × 20mm fine‑cut blade with a minimum of 48 teeth to achieve a clean finish. Jigsaws should only be used when scribing and shaping. Cut-out your pipes with a hole saw and now you’re ready to dry fit.

4. DRY-FITTING
Position the panel carefully to ensure it fits the space correctly, then insert 3mm spacers at the vertical corner joints and 5mm spacers along any horizontal joints.
Check and adjust alignment before removing the panel, then clean off any dust and debris.

5. ADHESIVE AND SEALANT APPLICATION
On the back of the panel, apply a bead of Complete adhesive, in horizontal and vertical lines across board (as pictured left) ensuring these lines are thicker than 6mm, and inset approx. 40mm from the edge.
As noted in step 2, apply a 2mm bead of Wilsonart Complete sealant to the groove and the tongue of the previously fitted panel.
Use sealant‑removal tools and clean alcohol-based wipes to remove any excess adhesive or sealant as you work.

6. FITTING
To fit the panel, connect the tongue and groove, pressing firmly until the sealant protrudes from the joint. Remove any excess sealant immediately to maintain a clean finish.
Brace the panel using a straight edge to ensure full and even contact with the wall. You’ll have around 10 minutes open time to make any adjustments.
7. REPEAT AS NECESSARY
For all the remaining panels, repeat the measure, cut, dry fit, and then apply sealant and adhesive before fitting the panels into position.
8. SEAL THE JOINTS
Allow 24 hours for the adhesive to cure fully, then remove all spacers. Backfill every expansion gap with Wilsonart Complete sealant, and also seal around pipework, fixtures, tray edges, and all vertical and horizontal joints.
Clean away any excess sealant immediately and allow 12 hours at room temperature before installing fittings.

9. STAND BACK AND ADMIRE!
Your panelling project is now complete, so take the time to admire your work, before handing over to your customer.

To explore the full Wetwall range, find installation guides for other Wetwall panels and find the right panels for your next project, visit: www.wetwall.co.uk
Jo Mailen is Product Lead at Wetwall.